Your app will likely contain text, images, audio and/or video. Optimising this content will not only make it easier for you to upload content but it will also mean quicker downloads for your users.
At the start of each project we always get asked what format content should be prepared in for the app. It’s a good question and one we will explore below for each of the four main formats:
It is worth compiling all (or most) of your content together before adding it to the Content Management System (CMS).
Text
Your Places and Trails app is location-aware. That means each place of interest (Place) is linked to a geographical location in the world. Compiling your content in a spreadsheet or Word doc (or equivalent) is probably the easiest way to capture all the information needed for each place of interest:
- Place name
- Location
- Trigger radius
- Content
Once you have uploaded all your content to the CMS you can select Places to form a trail.
Place name
This will be a unique name (for the purposes of the app) that describes the Place e.g. St Michael’s churchyard. Try to keep it relatively short.
Location
The latitude and longitude pinpoint the location of the place. Google Maps can easily be used to find the latitude and longitude of a Place, without even having to leave home! Open Google Maps and zoom into the correct area; in the example below I have chosen Chatsworth. I tend to work using Satellite view as it provides more information for me to find the exact location I am after – or enough of one to test on the ground once I have uploaded the content to the app. The default Google Maps view is Streetview so switch to Satellite view via the button in the bottom left corner (highlighted in blue in the screenshot below).
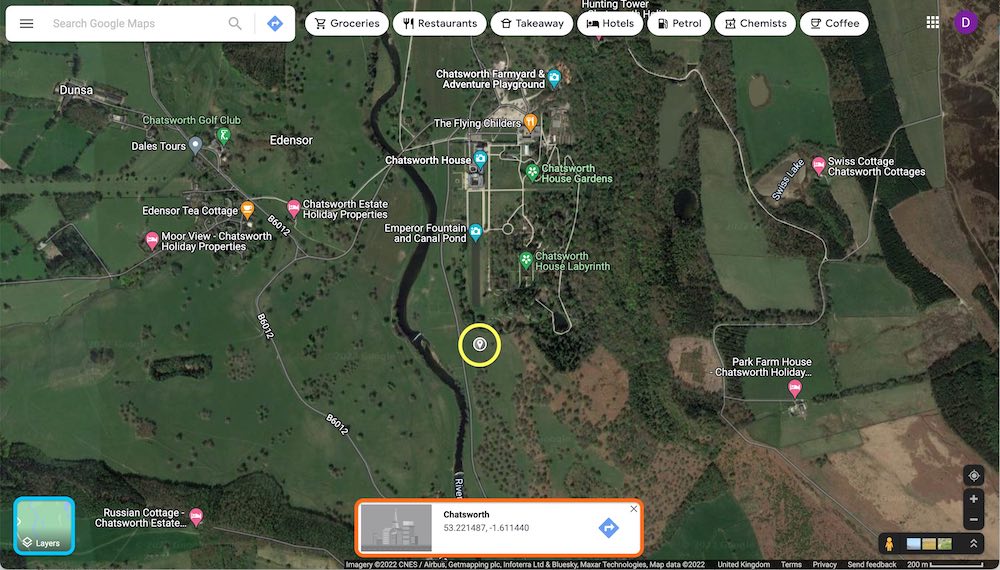
Two things appear on screen when I tap on the location of my Place:
- a small grey and white round icon with a pin (highlighted in yellow) representing the Place I have selected
- a pop up ‘modal’ at the bottom of the screen (highlighted in orange)
In the modal you will see e.g. ‘53.221487,-1.611440’. The first number (before the comma) is the latitude and the second is the longitude. You can copy and paste these numbers.
If you see something like 53°13’16.9″N 1°36’41.6″W – the ‘degrees, minutes and seconds’ (DMS) version – this is no use to us.
Trigger radius
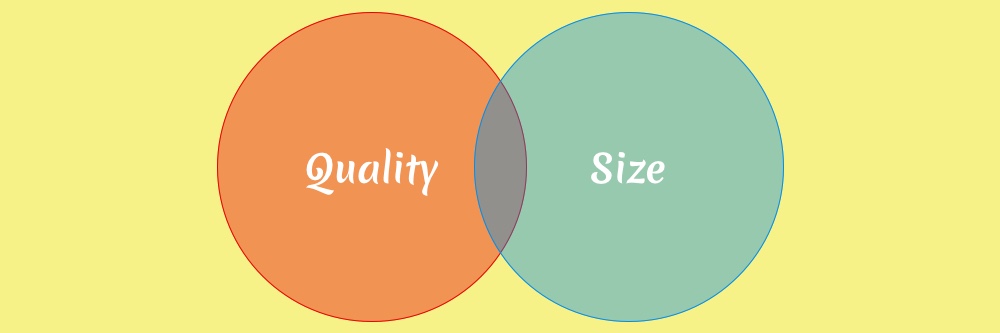
Imagine you are back at school and you have placed a dot on a map. Now take an imaginary compass and draw a circle around the dot. The distance between the dot and the circle is the radius. When someone using the app enters that imaginary radius the app will notify the user that they are close to a Place.
The trigger radius is set in metres, and each Place can have a different trigger radius. The minimum radius is 5 metres. This is to take into account any inaccuracies in the user’s device. There is no upper limit but be conscious that you don’t want the trigger radius of two Places overlapping. If a user happened to enter this crossover zone (think of a Venn diagram) then the app would be confused as it would want to trigger both places at the same time!
Please note: Google Maps doesn’t provide a way of showing trigger radius displayed on a map (the example above is purely illustrative), however our CMS does, for each individual Place.
Content
Structure your content remembering less is more – people are generally on a leisure visit when using these types of apps. Use the stories that provoke, relate and reveal. Leave them wanting more, not wondering how much scrolling they need to do to get to the end. Break copy up with headings and media to prevent a wall of text. Prepare image captions and alt text (descriptions for image for visually impaired) ready to drop into the CMS.
Filenames
It’s worth noting at this point the importance of a good filename. The temptation is to upload the file with whatever name it was saved as (an image from your phone might be called 20220317_160857.jpg).
Take a bit of time to rename the file so it relates to the Place e.g. St Marys churchyard soldiers grave.jpg. Avoid special characters e.g. @%# although using – or _ instead of spaces is fine.
Need help with your content?
We appreciate that creating content or compiling it to the correct formats can be a bit overwhelming. If so, why not ask us to help you?
Optimising images
There are two main image types: JPG and PNG. Which format you use will depend on the following factors.
JPG are best for photos. Cameras and phones tend to take high resolution images that are thousands of pixels wide. However, 1200 pixels is the sweet spot for your app. The best modern smartphones barely have a screen width any wider (believe it or not but iPads have smaller screen dimensions). Many phones have smaller screens. Therefore, anything larger (both in width and therefore file size) is a waste and may take extra time to appear on screen for the user. On the flip side, try to avoid images smaller than 800 pixels wide because these may look pixelated on screen. The exception might be archive images that might look blurry compared to modern images anyway.
PNGs are best for solid colours and lines e.g. logos and diagrams. PNGs can also have transparent backgrounds.
Changing the pixel size can be done on both a Mac and Windows computer using pre-installed software:
- On a Mac, open the image in the ‘Preview’ application, select ‘Tools’ from the tab at the top of the screen and then ‘Adjust size’.
- In Windows you can use the ‘Paint’ application. From the ‘Home’ tab, find the option called ‘Resize’. Select the ‘Pixels’ option to change the size.
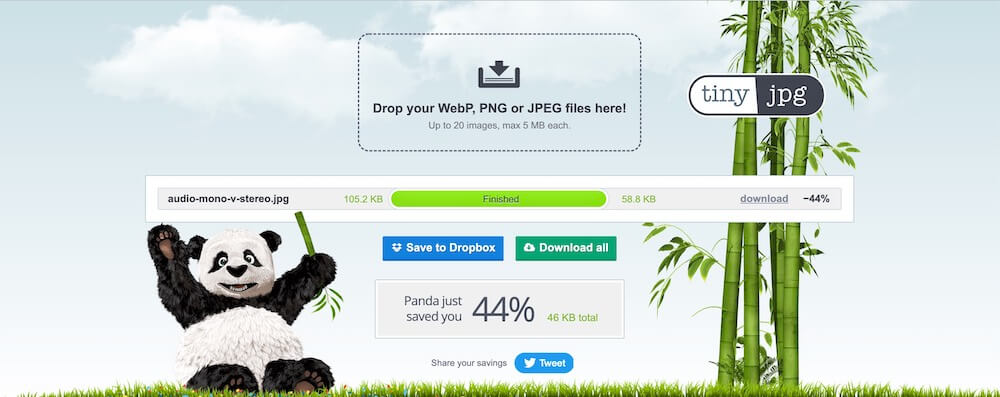
You can then use free online resources such as tinyjpg.com to remove any unnecessary metadata and optimise up to 20 images at a time (free version) without any loss in visual quality. It can reduce image file size by up to 80%, ensuring the quickest possible download speeds for your app users.
Alternatively you can use the free-to-use squoosh.app. This allows you to upload a single image and both resize and compress the image (select the output format e.g. jpg) before downloading it.
Finally, place all you images in one folder so you have everything to hand when you need it.
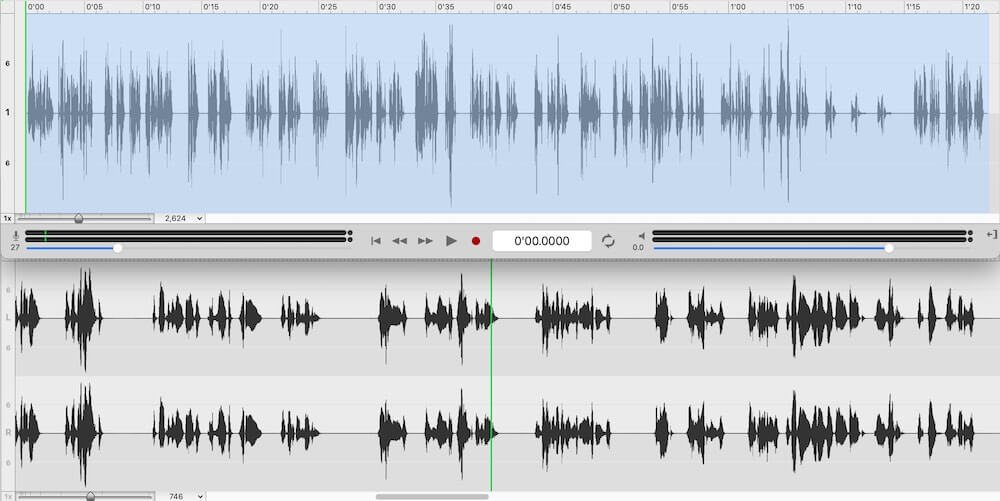
Optimising your audio quality
If you have oral history recordings, music or other audio it must be uploaded to the CMS in MP3 – a universal audio file type that will play on pretty much any device. Unless there is good reason, the audio should be mono (rather than stereo) and between 96 and 128 kilobits per second (Kbps).
The MP3 format can range from around 48 to 320Kbps, and streaming services like Spotify range from around 96 to 160Kbps. In general, a high bitrate means better sound quality so it is about getting that balance between quality and download speed. 128Kbps, in our opinion, is the sweet spot for app content. The human ear will notice a significant drop in quality for anything below about 90Kbps. A 256Kbps audio file will be twice as large as one saved at 128Kbps.
As a listener, the most noticeable difference between mono and stereo is that the latter is capable of producing the perception of width, because there is a left and right channel. Stereo is not necessary for one person telling a story, but for a piece of music where you’d like to localise where the sounds e.g. different instruments are coming from. But in most cases mono will more than suffice and ensure the content is downloaded twice as fast as a stereo file.
A one minute mono MP3 file saved at 128kbps is approximately one megabyte.
Video
In some instances we can embed very short video files within your app, but video files tend to be pretty large and often quite tricky to watch outdoors unless the contrast is good. For this reason we recommend video is streamed from the relevant page(s) in your app via YouTube. Users won’t need to leave the app page because the YouTube video player will appear on the page, inline with your other content.
YouTube is also very good at optimising video. You upload your video to YouTube and all you need to do is enter the Youtube ID in the CMS. To find the ID get a shareable link and insert the string of letters/numbers found after https://youtu.be/. For the Portrush Heritage Trails app promo video is would be knga_tmpP-o (https://youtu.be/knga_tmpP-o).
Need help?
If this all seems a bit overwhelming then simply get in touch so we can help you out.